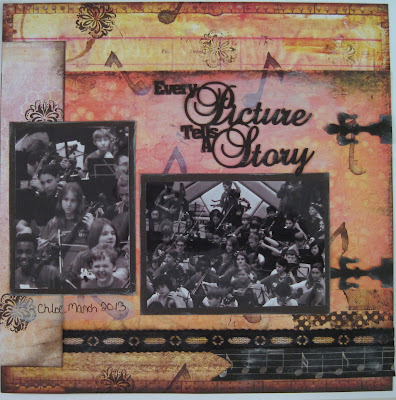
Back 15 years ago when I started scrapbooking, we made all our own embellishments. Over the years, the manufacturers have grown and make/sell just about anything to decorate your layouts - flowers, keys, gears, bottles, layered rosettes, fancy banners, bows, stick pins, name plates, brads, typewriter keys, tiles - you get the idea.
I think it is fun to buy the latest and greatest embellishments, but there are two reasons why sometimes I still like to make my own: (1). cost; and (2). personalization. Typically it is cheaper to make your own - I can purchase many yards of ribbon and make my own flowers for much less than it would be to buy pre-made flowers. Personalized - meaning - it can be any color, size, or shape. Here are a few examples....
1. Ribbon Flower: I have a very brief video on how I make the right flower on the right. You can watch the video here on YouTube. Flowers can cost $3-$5 for just a couple and we all like to puts a lot of flowers on our layouts. Buy the ribbon in bulk online and make 10 flowers for $5, plus they can be the perfect color to match your layout!
2. Stick Pins: Scrapbook manufacturer's are making stick pins now which are great because they normally coordinate with their paper. But what if you want to use a stick pin with papers that don't come with coordinating stick pins - DIY! I bought corsage pins from Michael's for like $2 with their standard 40% coupon. Add a couple beads, stickers, die cuts - anything - and you have your own stick pins!
3. Handmade Stamps: You can make your own stamps from cork, erasers, foam, any kind of soft block you can carve. I carved a music note for this layout. NOTE: Make sure if the image needs to be facing a certain way (like letters) that you carve the stamp in reverse. I learned that the hard way!
4. Found Objects: Everyone is using "found objects" in their projects - keys, name plates, buttons, bottle caps, gears, etc. You can obviously use the real things (yard sales, goodwill, your grandmother) - but if you don't have any laying around, you can make your own with a die cutting machine or by purchasing laser cut chipboard. Decorate them with paint, inks, glitter, markers, embossing powder, anything. I actually like these better because they don't add the weight or bulk of the real thing which is good for scrapbook pages you actually want to put in a book or cards you actually want to be able to mail :-) These chipboard hinges are from Gina's Designs.
Here are my final two pages using my DIY embellishments! What other fun embellishments do you make?


No comments:
Post a Comment