
Good morning Practical Scrappers! It's Ann Jobes here, and I wanted to share with you some of my favourite things to do with fringe scissors.

Your favourite online or bricks and mortar store likely stocks these and they have tons of potential for your papercrafting projects, so let me show you a few ideas!
The first thing you should know is these scissors have 5 pair of blades:
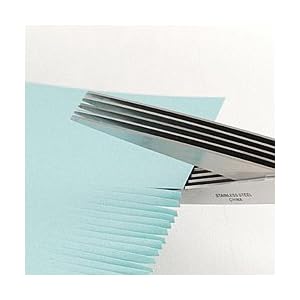
I found them easiest to use when I got the material I was cutting right up in the "v" of the open scissors, rather than trying to snip with the tips of the scissors. They are a little heavier than some scissors and this seemed to give the required strength to cut.
Idea #1
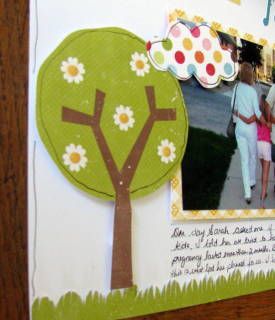
Fringe scissors are perfect for creating grass. You could snip into a strip of green cardstock, patterned paper or even felt. In this case, I snipped into a border sticker, to give it texture.
Naturally, anything made of grass, like hula skirts, could also be created in this same way. Wouldn't it be fun to add eyelashes to your diecut animals or snowmen?
Cut into other colours to create fringed borders to be layered on layouts and cards in a variety of colours and patterns.
Idea #2
Create a dimensional chrysanthemum-type of flower. Here's how:
Start with a patterned paper or tissue paper (I used a piece of sewing pattern tissue paper) and trim it to about 12 inches long by about 4 inches wide.
[img] [/img]
Fold the paper in half lengthwise, and then fold in half lengthwise again. Your paper should now be about 12 inches long by 1 inch wide.
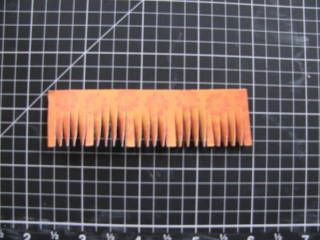
On the side with all the folds, use your fringe scissors to cut at even intervals from one end to the other. Do not cut right through, but try to get about 1/4 inch from the edge.
Once you've cut into the whole length, it should look something like this. Then, using a glue gun, or Beacon's 3-in-1 (my favourite!), apply a stream of glue along the non-fringed edge and begin rolling the flower. Once rolled, poof a little and you are done!
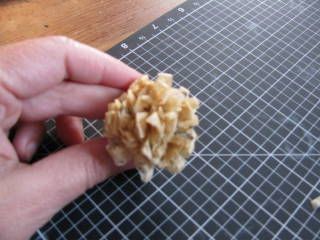
Idea #3
If you follow the above instructions, but cut into the opposite edge to the folds, you make a fun pompom. I used a whole sheet of tissue paper (I made folded in half three times, not two) to make a pompom big enough for this large gift.
Idea #4

Create a decorative medallion for your card or layout by create a fringed strip (idea #1) about 12" long and adhering it around the edge of a diecut or chipboard element. Again the Beacon's 3-in-1 or a glue gun is your friend here, because they hold fast and dry fast. Can you imagine making this with a Christmas diecut or chipboard element and a vintagey text paper? Or use a diecut with a number on it and apply the fringe to create a prize ribbon to go on a page about winning a contest or overcoming something.
The ideas are only limited by your imagination.
Idea #5
Use the fringe scissors to cut strips, and then weave the strips to create a mat or element for layering.
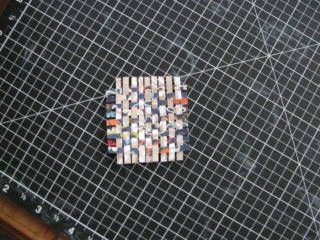
Idea #6
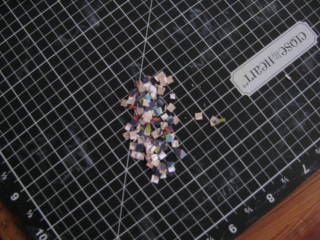
Use the fringe scissors to cut strips, then gather them together and cut the opposite direction to create square confetti. I'm planning to make some confetti from my scraps of glittery paper!
I hope this gets your imagination going and that you'll look at your fringe scissors and see lots more ways to use them now! I can't wait to see what you make using fringe scissors!
Your favourite online or bricks and mortar store likely stocks these and they have tons of potential for your papercrafting projects, so let me show you a few ideas!
The first thing you should know is these scissors have 5 pair of blades:
I found them easiest to use when I got the material I was cutting right up in the "v" of the open scissors, rather than trying to snip with the tips of the scissors. They are a little heavier than some scissors and this seemed to give the required strength to cut.
Idea #1
Fringe scissors are perfect for creating grass. You could snip into a strip of green cardstock, patterned paper or even felt. In this case, I snipped into a border sticker, to give it texture.
Naturally, anything made of grass, like hula skirts, could also be created in this same way. Wouldn't it be fun to add eyelashes to your diecut animals or snowmen?
Cut into other colours to create fringed borders to be layered on layouts and cards in a variety of colours and patterns.
Idea #2
Create a dimensional chrysanthemum-type of flower. Here's how:
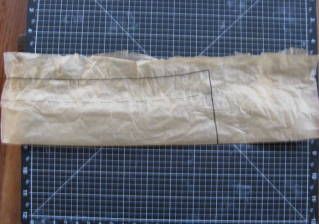
Start with a patterned paper or tissue paper (I used a piece of sewing pattern tissue paper) and trim it to about 12 inches long by about 4 inches wide.
[img]
[/img]Fold the paper in half lengthwise, and then fold in half lengthwise again. Your paper should now be about 12 inches long by 1 inch wide.
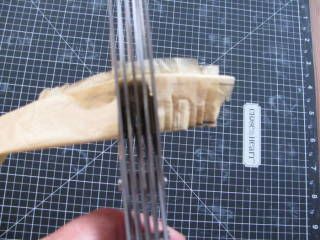
On the side with all the folds, use your fringe scissors to cut at even intervals from one end to the other. Do not cut right through, but try to get about 1/4 inch from the edge.
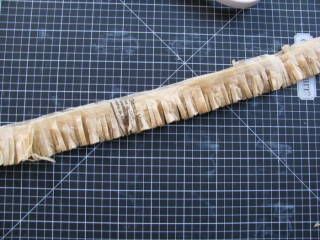
Once you've cut into the whole length, it should look something like this. Then, using a glue gun, or Beacon's 3-in-1 (my favourite!), apply a stream of glue along the non-fringed edge and begin rolling the flower. Once rolled, poof a little and you are done!
Idea #3
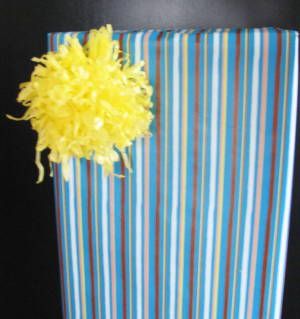
If you follow the above instructions, but cut into the opposite edge to the folds, you make a fun pompom. I used a whole sheet of tissue paper (I made folded in half three times, not two) to make a pompom big enough for this large gift.
Idea #4
Create a decorative medallion for your card or layout by create a fringed strip (idea #1) about 12" long and adhering it around the edge of a diecut or chipboard element. Again the Beacon's 3-in-1 or a glue gun is your friend here, because they hold fast and dry fast. Can you imagine making this with a Christmas diecut or chipboard element and a vintagey text paper? Or use a diecut with a number on it and apply the fringe to create a prize ribbon to go on a page about winning a contest or overcoming something.
The ideas are only limited by your imagination.
Idea #5
Use the fringe scissors to cut strips, and then weave the strips to create a mat or element for layering.
Idea #6
Use the fringe scissors to cut strips, then gather them together and cut the opposite direction to create square confetti. I'm planning to make some confetti from my scraps of glittery paper!
I hope this gets your imagination going and that you'll look at your fringe scissors and see lots more ways to use them now! I can't wait to see what you make using fringe scissors!
**Designer projects are not always linked in our posts, but you can always find their blogs in our sidebar or in the staff tab**
2 comments:
Some great ideas, thanks!
they all look so fun to make, too!
Post a Comment