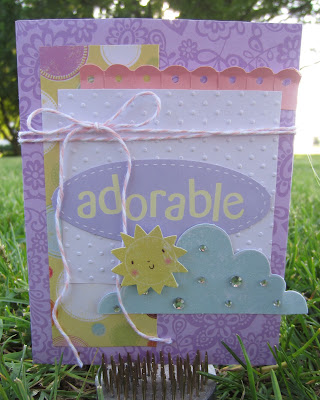
Showing posts with label Erin. Show all posts

Monday, June 4, 2012

1O Things You Can Do With: Eyelets


Last week we tackled the dreaded loose glitter and this week we are back with another supply that many of us struggle to use: eyelets!  Our designers have got some fabulous ideas today on how to use some of those eyelets up, imagine how surprised everyone will be when they see you using this oft neglected supply!
1. Create bubbles for a fish.
Practical Scrapper Kerri used her eyelets to create the bubbles leading to her sentiment on her fishbowl card.  Don't just think fish though...you could do bath bubbles, outside bubbles...think of the fun!


2. Use them to bind and create handles on your mini albums.
You cannot see them, but Practical Scrapper Kerri used eyelets and wire to create the handle on this mini album.  She then dressed up the handle with some tulle and ribbon to disguise the wire.


3. Use them to anchor embellishments.
Practical Scrapper Mary Pat uses them to randomly place embellishments on a page.


4. Make wheel rims and wheels for your vehicles.
Practical Scrapper Erin dresses up the trucks on this card using products from Momenta with eyelets and brads.

5.  Use eyelets to make a corset or other item to lace
Practical Scrapper Jayma uses them to tie a corset on a Bridal Shower card.

6. Use them to decorate the center of circles or flowers.
Practical Scrapper Audrey added dimension to her layout using brads and eyelets on flat circles..


7. Arrange them in a pattern to create a small grid, thread some twine and use them as a photo corner or accent.
We can't show you the whole layout here because it's being used by a manufacturer later but Practical Scrapper Audrey. gave us a sneak preview of another neat way she used eyelets!


8. Add eyelets to the top of tags
Practical Scrapper Christine created her own tags and then added eyelets to them before tying bows around them and using the tags as an anchor for her title.

9.  Use eyelets in the corners of a rectangle to create a frame.
Practical Scrapper Christine used green eyelets in the corners of her brown rectangle.  She then threaded white embroidery floss thru those to create a unique border.

 1O.  Use them to create a swirl or trail
Practical Scrapper Alumni Jenny Titus created her ladybug trail with black eyelets, especially standing out on the green paper.


**Designer projects are not always linked in our posts, but you can always find their blogs in our sidebar or in the staff tab**

Monday, May 21, 2012

10 Things You Can Do with Letter Stickers

Welcome to our second installment of 10 Things! This week we are giving you ten ideas of things to try with your letter stickers. They are so hard to use up, but an absolute must have item in papercrafting.  Here's some inspiration on how to use some up or use what you've got in unique ways! Ready, set, go!

IMG_0520
1.  Embellish your letters with thread or bakers twine to add color and interest to plain letters.
Practical Scrapper Christine used purple thread that matched her patterned paper and wrapped it around her "c" and "o" several times to completely change up the look of her Thickers.

2.  Use O's in fun ways to add character to your project
Practical Scrapper Kerri used her O's to make cute eyes for a Halloween card.

3.  Use letter stickers to create a critter and/or form an interesting border.
Alumni Practical Scrapper Jamie Cripps used O's to make her critter and then used W's to create an interesting edge on her card.

4.  Use Z's to mimic sleeping
Practical Scrapper Kerri used Z's in all different fonts to show off a cute sleeping baby.  What a great way to use up some of those Z's that are hard to use!

5.  Use lined up B's to make a funky butterfly
Alumni Practical Scrapper Jamie used to B's lined up back to back and mounted on black paper to form her own one of a kind embellishment.


6.  Use stickers as a stencil to trace your letters (works great if you don't have the color you need!)
Practical Scrapper Christine stuck her letter stickers that she wanted to trace onto her shirt first.  This helped remove the stickyness enough so that she would be able to pull them up after tracing them.

 
7. Use letter stickers to frame a school picture...using up lots of the alphabet!
Alumni Practical Scrapper Kim used hers coordinating the color but really making them stand out by using quadrilateral shapes to frame a circle

8. Intermix fonts and colors to create added interest
Practical Scrapper Christine used a variety of fonts to create her title and journaling on this page.  They also served to spell out words that she couldn't find a word sticker for.

9.  Mount letter stickers on a different color to create a mat that matches other elements on your layout
Practical Scrapper Erin utilizes this technique regularly.  Here she mounted her white letters onto black and cut around them making white letters work perfectly on this layout.

 
10. Use a variety of fonts to create a list
Practical Scrapper Erin used a variety of fonts to tell the story of choosing a name for their new puppy.

Monday, May 14, 2012

Ten Things You Can Do with Border Punches

Welcome to our brand new feature "Ten Things Tuesdays."  Each week we will present a tool or product and ten ideas of how to use it that are a little out of the box.  Hopefully we will get some creative juices going for you on how to use items you've already got in your stash!  This week we kick it off with one of my favorite tools:  Border Punches!  


 1. Create tags using a border punch.
Practical Scrapper Christine used a fiskars punch and trimmed between every two scallops to create individual tags (these would be great for journaling strips too!)


2. Create a layered flower.
Practical Scrapper Kerri used her corner border punch from one of her Martha Stewart combo sets to create this layered flower.  She started by cutting three circles with her Creativer Memories circles at  2 1/2", 2 1/4" and 2" then punched around each circle and used some foam pop ups in between each circle.


3. Make a funky starburst.

Practical Scrapper Erin layered strips of patterned paper, some punched with border punches, and washi tape to create a starbust design (punches by EK Success and Martha Stewart).

4.  Use 3-Do  embellishments to "embellish" your border.
Practical Scrapper Jeannie added pearls to the center of her negative circle space.  She used an EK Success punch.

 5.  Use your scissors to alter your border.
Practical Scrapper Christine used her Fiskars punch and changed it up by snipping in between each scallop.  She also created dimension by curling the scallops forward.


6. Repeat border and layer to create ruffles.
Punch used: Martha Stewart, card by Practical Scrapper Jayma


7. Weave thread or ribbon thru the holes created by a border punch to make the strip color coordinate.
Practical Scrapper Jeannie used all kinds of border punch techniques on this card be it to create different edges, add dimension, embellish her dress...take a good, long look at this one!

8.  Layer scraps behind the negative space created by your punch.
Practical Scrapper Christine used scraps to totally change the look of her punch.  This is the same EK Success punch you saw used in Jeannie's card above!

 9. Create individual squares and punch all the edges to make a unique looking square.
Practical Scrapper Erin took the grid look one step further with her unique squares and she jazzed it up even more adding eyelets to her Fiskars punch holes.


10.  Use thread and do some hand stitching to embellish your border.
Practical Scrapper Christine used that EK Success Punch that keeps showing up and did stitching to change up her border.

What are some items/tools you'd like to see featured here?  We've got the next month planned but are wide open to what you want beyond that!
-Christine


Wednesday, April 11, 2012

Baby Layouts

Whether your layouts are made of "sugar and spice and everything nice" or "snips and snails and puppy dog tails", one thing is for sure...those pages of your little bundles of joy are some of the most fulfilling scrapbooking pages you will ever complete.  My children's baby albums were three of the first albums I ever started as a scrapbooker, but they are yet to be complete (I need to get a move on since my children are now 12, 7, and 5).  Why is that you ask?  Because I create so many baby layouts with the same photos that I never get any further.  At the rate I'm scrapping my kids baby albums, I may be lucky to finish them by the time they graduate from college.  After seeing all this baby inspiration it may even take me a little longer ...

Practical Scrapper Julie
based on a sketch by Kristy Lee for ScrapbookSteals.com


 Practical Scrapper Erin


Practical Scrapper Caz Hancock


Fay Lyth
 
Practical Scrapper Kerri

 
Pin It **Designer projects are not always linked in our posts, but you can always find their blogs in our sidebar or in the staff tab**
Sunday, April 1, 2012

Frugal Finds: Bobby Pins

Welcome back to our monthly installment of frugal finds and do we have a "doosie" for you this month. Back in February when Christine, Erin, and I were trying to come up with what we wanted to do,  I posed bobby pins as an option.  I had just finished giving my five year old daughter an up-do for a "Fancy Nancy" birthday theme party she was going to and inspired me to try to use these in another way.  All thought it sounded interesting and what's even more interesting, are the ideas that we all came up with on how to use them.  A special thanks to design team member Liz for joining in with us!   Hope you enjoy all our bobby pin creations...

Practical Scrapper Erin used Bobby pins with rhinestone butterflies on them to make the bodies of her canvas butterflies. Just slip them over the canvas, and wrap the top pin with yarn or twine.


Practical Scrapper Liz made this simple Thank You card using bobby pins as a design on the puffy hearts. She covered the pins with micro beads and topped them off with a small sequenced flower.

On this layout,  Practical Scrapper Kerri painted her bobby pins white with white acrylic paint.  She then used them to create her journaling lines in the bottom right hand corner of her layout.


Practical Scrapper Kerri was inspired by the layout of this card from her online scrappy friend Cassie D'Ambrosio.  She then decided to add her own twist to Cassie's design my adding some more painted bobby pins and then embellishing them with some dew drops from one of our past sponsors The Robin's Nest.


Pin It **Designer projects are not always linked in our posts, but you can always find their blogs in our sidebar or in the staff tab**

Sunday, February 19, 2012

Frugal Finds: Candy Wrapper Edition

We're taking our inspiration from the recent holiday and using candy wrappers for our frugal finds topic this month.  This one definitely required some thinking out of the box!  Check out these creations!

 Hershey Heart Wrappers covering Maya Road Chipboard.
Practical Scrapper Cathy


Practical Scrapper Kerri used her Dum Dums wrappers to create her "lollipops".  She wadded up a tissue and covered it with the wrapper then tied it off with some Martha Stewart baker's twine.  She also used the dum dums wrappers to create the accordion flowers on the ends of her banners.


If you are one of the scrappers who has a hidden stash of chocolate bars in you office then this project is for you!  On this card, Practical Scrapper Kerri used some mini Hershey bar wrappers to embellish her card.  She altered some brads, used the wrapper as a layer of paper in her banner, and created an accordion flower out of them.  What a perfect way to get rid of the evidence-- no one will ever know ;)

Practical Scrapper Carolina used the wrapper that covered a chocolate marshmallow heart (yummy!) to cover the pop up heart she cut with her Silhouette.

 Practical Scrapper Erin used the inserts from this year's Valentines chocolates to create a page. She used embossing folders on two of the hearts, and attached the chocolate liners to the third to create a ruffled edge.

Pin It **Designer projects are not always linked in our posts, but you can always find their blogs in our sidebar or in the staff tab**