Showing posts with label 10 Things. Show all posts

Tuesday, July 2, 2013

Ten Things & Blog Hop Winner

First off congratulations to Julie E!  You are the winner of the Scraptown Lady gift certificate from our blog hop!  Please email me at practicalscrappers@gmail.com to claim your prize!

Now on to the Ten Things for today!  Today we zoned in on stars...and once again our designers hit this one out of the park!

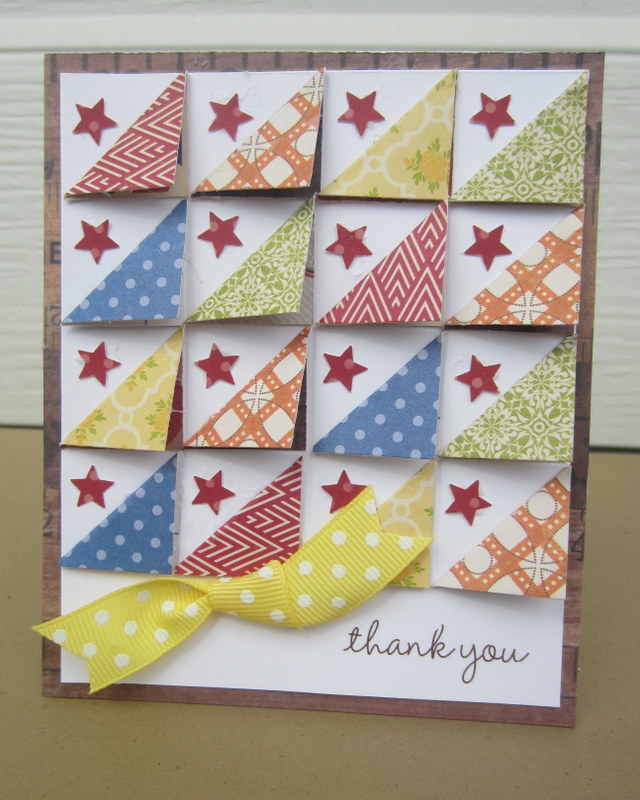
Practical Scrapper Christine added stars to her quilted card to give it an Americana feel.


Practical Scrapper Jessica Arrant used two types of origami stars to create a focal point on this layout about her son's current favorite song.


Practical Scrapper Lisa M stitched her stars and then colored them in with watercolor pencils and added water.
Practical Scrapper Wendy built origami "fireworks" with Cricut diecut stars and twist tie streamers dancing in the background topped with quilled Mickeys for this Disney inspired photo display frame. Check out lots of close up pictures of this kit on her blog!

Practical Scrapper Charity used eyelets and twine to add stars to her layout as well as a sketch from Sketchabilities.

Practical Scrapper Christine folded diamonds in half to create a fun geometric star as the focus of this card.

Practical Scrapper Stephanie used stars to make this card shine!
Practical Scrapper Jennifer Campbell used a star stamp set and matching star punch to create this card!

Practical Scrapper Leslii used 1 inch stars to fill the 11 inch star on her wall hanging.
 
Practical Scrapper Brenda Ragsdale used the negative space from stars she cut using the Cricut, to layer under her photo and embellish the her page. She also added brads to the center of the stars in the patterned paper. 
 
Practical Scrapper Deborah Johnson used wood veneer stars to create a banner on this everyday occasion card.
 
Have you got stars? We wanna see them twinkle and shine! Load your star projects to the Facebook page!!!
 

Tuesday, June 11, 2013

10 Things: Bags

Bags seem to be everywhere these days.  Cute bags to use on scrapbook pages, tiny bags to add to cards, gift bags to decorate.  There are so many ideas and today the 10 Things Team has 10 uses for bags plus a few bonus projects! 
 
1. Create a bag.  Practical Scrapper Charity made a bag out of netting to hold a paper heart.

2. Use a bag to hold a journaling card.  Practical Scrapper Charissa used 3 bags behind her photos to hold her journaling and some other embellishments.

3. Use bags as layers on your scrapbook pages.  Practical Scrapper Linda used small paper bags as embellishments and part of her layering under the photo. There is also a journaling card hidden in one of the bags.
 

4. Decorate a bag with a topper.  Practical Scrapper Jenn Campbell used a small Glassine bag as a quick, easy gift! Add a bag topper and some candy and you have a perfect gift for a friend, teacher, hair stylist and so much more!

5. Use a bag to hold embellishments.  Practical Scrapper Lee-Anne Thornton used a glassine bag to add a journal tag and her title as well as a "flower pot" to hold the flowers.
 
6. Decorate a gift bag with a hand made card.  Practical Scrapper Wendy used a steel cut die to create a hanger to quickly decorate the front of a gift bag with a handmade card.

7. Use a bag to make another embellishmet.  Practical Scapper Kelli used a kraft paper bag to create ribbon.

8. Make a tiny bag for a card.  Practical Scrapper Sarah used scrapbook paper to create a 3D mini bag on her birthday card.

9. Use a bag to hold confetti for a fun background.  Practical Scrapper Kristy upcycled a glassine bag and filled it with mini-confetti and sealed it shut with washi tape.

10. Recycle a shopping bag into gift bag.  Practical Scrapper Kelly Jean upcycled an Ann Taylor shopping bag into a birthday gift bag.
 
 
Now here are a few BONUS ideas...

11. Use a bag to hold a gift card on your hand made card.  Practical Scrapper Leslii Wagner used a small craft sack on this card for Dad.  It is just waiting for a gift card to go in it!

12. Add a photo to the front of a bag.  Practical Scrapper Brenda mounted her photo on a kraft bag and also folded the top portion of a smaller kraft bag, folded it over the top of her layout, inserted a tag and created an embellishment cluster.
 
 
We hope you enjoyed the ways that we used bags today.  Be sure to visit these ladies' blogs and leave them some love today!  And if you use a bag on a project, we want to see it!  Please share your projects on our facebook page!

Tuesday, February 26, 2013

10 Things - Transparencies

Today's 10 Things is all about that stuff we can't see, and using it with the stuff we can. Vellum, transparencies and clear embellishments got you stumped? Have a look at these fantastic ideas!

 1. Trap some good stuff. 
Practical Scrapper Charissa stitched a transparency onto her layout to create a pocket for confetti and glitter for a fun and interactive element.


2. Cut it out.
Practical Scrapper Linda used a key cut from a transparency sheet as an embellishment. She also used clear buttons here and there on the layout.


3. Create a false window.
Practical Scrapper Karen used permanent ink to stamp a bracket frame on the transparency and then embossed the flowers for her sophisticated sympathy card.


 4. Die cut it.
Practical Scrapper Lisa die cut her butterfly from transparency using her Cricut. She added some paint strokes to the back of the transparency and layered it on top of  patterned butterflies giving the wings  a textured and glossy look.


5.Colour it.
Practical Scrapper Lanette created a stained glass card using a transparency and gel pens.


6. Make it a base.
Practical Scrapper Sarah used a transparency to create a clear card.  By placing layers on both the inside and the outside of the card, she was able to create a fun, 3D effect on a clean and simple card.


7. Help them fly. Practical Scrapper Kenya used transparency scraps to give the butterflies a floating effect. 


8. Layer it up.
Practical Scrapper Kelly Jean fussy-cut onsies from a Hambly Screen Prints transparency and backed them with patterned paper to create a banner for her card.


9. Add some shine.
Practical Scrapper Leslii Wagner used clear bottle cap embellishments on each of the outer circles of her hand drawn flower.


10. Stamp it.
Practical Scrapper Erin stamped her butterflies onto vellum using Staz On, and then coloured the reverse side using Copic Markers.


Tuesday, January 29, 2013

10 Things you can do with Kraft paper

We scrapbookers and paper crafters sure do love our Kraft paper! In the last few years, Kraft has moved from being a hot trend, to settling in as a basic scrapbooking staple. But did you know that the term "kraft" paper refers to the process in which the paper is made, and not to the colour alone? I knew kraft was special from other papers, but now I know why! if you need more convincing, just check out the  versatile ways in which you can use it.
 
1.Tag it
 Practical Scrapper Claude uses Jillibean Soup's kraft journaling tags for a fun background.


2. Get detailed.
Practical Scrapper Lee-Anne used kraft as her starburst border,  the sparkler and for the word "awesome" as part of her title.

3.Make an impression.
Practical Scrapper Lisa used kraft as her card base. She first cut a heart out of the card using her Cricut and then embossed the kraft background. She used bright colored washi tape behind the negative heart cut. Finally she punched a heart out of kraft and popped it up finishing with a bit of bling in the center.

4.Wrap it up.
Practical Scrapper Kelly Jean used scraps of kraft paper to create her own wrapping paper.  To do this, she simply spray-misted and stamped various images repeatedly onto the kraft paper.  


5.Make colours pop.
Practical Scrapper Sarah combined kraft and burlap in a modern way by keeping the color scheme monochromatic and adding a couple of pops of bright red.  


6. Label it.
Practical Scrapper Linda used kraft as the background of her letter sized layout. She stamped images on the background using VersaMark ink. She also used strips of kraft on her Dymo Labeling Machine creating embossed text.

7.Use your "Imagine"ation.
Practical Scrapper Kenya used her Cricut Imagine to print a pattern on Kraft paper. She also used the Kraft paper as an embellishment.

 
8. Make it sparkle
Practical Scrapper Charity used stamps, Elmer's school glue, and
Martha Stewart Glitter to add bling to her Kraft paper.


9. Frame it
Practical Scrapper Leslii mitered her craft paper to create a frame for her page. Kraft paper frames the pictures and layers the flower embellishment.

 10. Use a print.
Practical Scrapper Erin used a pre-printed kraft paper as a background for her layout. 

So maybe it really doesn't matter to most of us how Kraft paper is created, as long as it keeps that warm raw colour that works with anything, and as long as we can keep using it on our projects and pages. 

Happy Krafting!


Tuesday, January 8, 2013

Ten Things You Can Do With Felt ( with a Bonus)!

After nearly 6 weeks of hiatus, it's back!! Ten Things Tuesday has come back in style and this week we are kicking it off for you with ways you can use that felt. And because we were gone for so long, we even through in an added bonus one giving you 11 great ways to use up that felt!
 Felt is a hard thing for me to use when it comes my scrapbooking and card making.  For some reason I have a hard time associating it with anything other than puppets--don't laugh!  The ladies really out did themselves and came up with some fabulous felt inspiration-- so much that when I am done with work today, I'll be hitting my Joann's on the way home and picking up some to play with!


1.) Use a Felt Coaster as a Mask
Practical Scrapper Charity used a felt coaster from Michael's as a mask to mist this snow flake onto her cardstock.


2.) Use Felt Shapes as Embellishments
Practical Scrapper Charissa cut hearts out of felt from the craft aisle at Target and stitched them onto her layout as part of her embellishments.

3.) Stamp and Emboss On Your Felt
Practical Scrapper Karen stamped the bird directly on teal felt with
Ranger Perfect Medium and embossed the felt with a heat gun creating a textured webbed look.  

4.) Wrap It Up!
Practical Scrapper Claude used older Fancy Pants pieces of felt. She gave them new life by wrapping them in twine.

5.) Die Cut It!
Practical Scrapper Linda made a felt mannequin using felt and a Sizzix die. 

6.) All Eyes Are On It!
Practical Scrapper Sarah used felt as a focal point in her layered,  paper pieced tea cup.

7.) Layer It Up!
Practical Scrapper Kelly used felt and a Page Extension by Creek Bank Creations to create a felt banner to match her layout about volleyball.


8.) Cut It and Create 3D Embellishments By Layering!
Practical Scrapper Cathy used Tim Holtz's Sizzix Tattered Flower Die to cut the layered felt flower, backed her negative die cut title with the grey felt and cut a triangle out of felt for the photo corner.


9.) Create A Bucket Full of Posies!
Practical Scrapper Lanette topped some of her favorite pens with cute little felt flowers to encourage her to journal more this year.


10.) Roll It Up To Create Some Rosettes!
Practical Scrapper Lee-Anne handmade all her flowers from felt to embellish her layout. 

11.) Felt Pierce It!
Practical Scrapper Kenya used her Spellbinder's Classic Circles and pierced it together to create this cute little snowman card.


**Designer projects are not always linked in our posts, but you can always find their blogs in our sidebar or in the staff tab**