Showing posts with label tutorials. Show all posts

Wednesday, December 14, 2011

3-D Snowflake Tutorial

Hi everyone!  Fern here with a tutorial on how to make a 3-D snowflake out of med/heavy weight paper...  You can make these any size you want.  They would be great on your tree, hanging in the window, decorating a Christmas package or hanging on the staircase, as you will see I've done.

Materials you will need...
Double sided Pretty Paper..  I used My Mind's Eye ~ Lost & Found Collection
Stapler
Glue
Tape
Scissors
Ruler
Pencil


First cut 6 squares.. They can be 3", 4", 5" or 6".. Mine are 6 inches so I used 1 1/2 pages of 12" x 12" paper... This will make a (large)12" snowflake..   Now fold each square and make a triangle... If it doesn't match exactly along the edges... trim it until it does..


Now line the bottom of the triangle along the ruler and make a mark at 1", 2" and 3".  This will not work on the other sizes..  If you use the smaller squares just use your pencil and try to get the strips as even as you can.. 


Now take your ruler and pencil and very lightly draw a line at the 1", 2" and 3" mark as shown below.. 


Now fold it over again to make a smaller triangle..  Don't crease it...


Now cut through all layers on the straight lines you just drew.. but not all the way through...leave about 1/4th inch+/-..


This is what it should look like when you unfold it....  Now do the remaining 5 squares just like this one..


Now turn them all over


This photo actually shows 2 of the squares folded and glued..  For the first one, take the first (smallest) square and bring the tips together and tape/glue.  Then turn your 6" x 6" square over and bring the 2nd square tips together and tape/glue.. See photo below...


Now turn it over and do the same with the next square and turn it again and do the last square the same ...  Should look like this..


Do the remaining 5 the same way... They should all look like this...


Take 3 of  these and put the bottom points on top of each other and staple..  Should look like this..


Now do the same with the other three....  You should have this...


Now take these and put them together where you stapled before, and staple them together.  
  Now glue/tape each section where it meets with the one next to it.. This holds the shape together... 
Now it should look like this..


And here it is on my staircase...


These are really fun to make and I hope you give it a try...

Pin It **Designer projects are not always linked in our posts, but you can always find their blogs in our sidebar or in the staff tab**

Monday, November 14, 2011

Paper Pinecone Ornament

Over the next month we are going to be featuring daily inspiration for your Christmas projects!  Our designers will be taking turns showcasing ideas - we hope you will enjoy this different format!  As you are looking for other ideas don't forget to check on our tab "Idea Central" and look under the huge list of Christmas ideas there (these are projects from the last two years).


To kick things off we've got Audrey here with you today to share a quick tutorial on making a cute little pinecone ornament!
Here's what you'll need:
*~60 hearts cut out of brown cardstock (about 1.5" high).  Use your die cutting machine to make this step a LOT faster.  But a heart punch will work, too.
*styrofoam egg
*glue gun
*glitter.fake snow
*ribbons

First, take all of your hearts and pinch each lobe to make a crease in each to give the cone a bit of dimension.

Starting at the tip of the cone, tightly wrap a few hearts around each other and trim off the pointy ends.  Glue to th small tip of the egg.


Working your way up the cone, start gluing and overlapping hearts.  You want the lobes on one layer to be inbetween the lobes on the next layer.

When you reach the other end, you need to push the points down and hot glue them to the egg. 


Add some glue to the lobes of each heart and sprinkle with loose glitter or fake snow, or you could use stickles.

Add some ribbons to the top with some pins. Hang on your tree and VOILA!

Hope you enjoyed this tutorial today!  Have a wonderful holiday season!!

Pin It

Saturday, September 3, 2011

Tips and Tricks: Taking a Great Picture of your Cards

My husband is entertained by the fact that as a blogger and scrapbooker engrained in the industry you have to consider how each project will photograph.  It is definitely an added complication, but with some tricks you can learn to take photos of your projects that truly enhance it.  Have you ever looked at a picture of a card and wondered how you could get yours to look better?
 Today I am going to share with you how I take my card pictures.
The first question I always ask is whether the card will benefit from a nature scene, solid scene, or a patterned scene.   I usually pick out a couple options to try and don't determine what I like best until I actually see it on the computer. Here's examples of what I mean by all three:
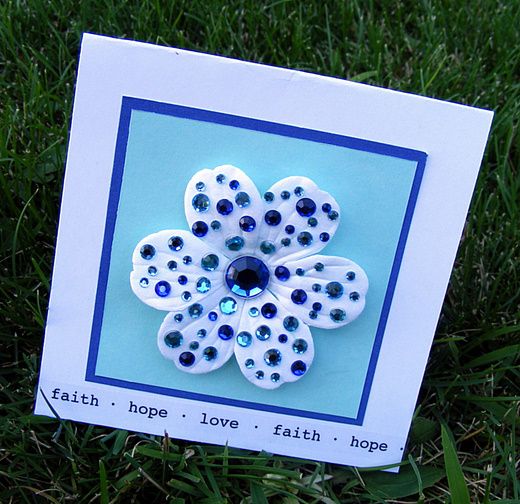
This one I took in the grass...it could have worked in the other settings, but it definitely works nicely here.

Here I did a patterned paper and a white paper

Here I did two sheets of patterned background.  The patterned paper background just adds an extra amount of interest to your picture.  At times it will be distracting but at others it will add just the right touch.

Here's a solid background 

A solid background allows you to a pull a color out of the card and really make that color pop.  Black can be especially striking and remove all distractions.  But sometimes you might need a brighter color to really draw attention to that color in your card.   Now if you are wondering what I mean by my background...here's how I set it up:
I use my front steps and usually have a child helping :).  
-I set up two 12 X 12 papers at a 90 degree angle and shoot.  
-I like to take my pictures outside whenever possible. 
 -If I can't then I do it inside close to a door or window.  
-I have a cheap digital camera and have found that for me natural light is the only way to get a crisp picture that I am satisfied with.  
-As you can see from my pictures above I play with angles a lot.  
-I definitely prefer to get my cards pictured on an angle and will shoot about 10 photos all from different angles.  
-My last step is editing:   First I load them into Picasa and crop them down.  
I then upload them to Photobucket and use that for sharpening and color adjusting.  
Any photo software can work, I just use the free stuff :)

I hope you've enjoyed this little tutorial...if you have a question that I haven't answered leave it for me in the comments and I'll get back with you!

Monday, January 10, 2011

Make Your Own Glimmer/Shimmer Mist Tutorial!

Erin told you it was on its way, and here it is! There are many videos out there on how to make your own, but I have a little twist in mine. Instead of using re-inkers, I use some good old fashion liquid food coloring drops (something a little more practical that you might be able to find in those cupboards). I'm not an expert on creating videos (this is just my second one), but I think you can get some good information out of it!


Now that I shared the tutorial with you, I thought I share a layout I just finished up (minus my journaling)using the mist I created in this video.

On this layout I misted 5 "blobs" of my green ink around where I was going to place my pictures. I also using my mist on the corrugated cardboard letters. I inked them with some peeled paint distressing ink, layed them in my cardboard box I use for misting, and sprayed them all with my mist until they were really covered. I then took a rag and soaked up all the puddles of mist left on the letters to leave a nice light green shimmer to the valleys of the letters.

Hope you all enjoyed the tutorial and layout. Don't forget about ou upcoming calls...A fabulous feature of Echo Park projects, cards and layouts with snowmen/snowflakes, and cards and layouts using boarder punches....stay tuned for more to come!


Saturday, October 30, 2010

How about some distressing tutorials this morning?

We have such incredible ideas to share with you today! Here at Practical Scrappers, we are all about sharing ideas, tips, and techniques. We've had two marvelous tutorials submitted showcasing distressing. Both feature different ideas about distressing and to be creative when using this much loved technique.  First up is a tutorial submitted by Cricket Rookie. She is going to inspire you to create a grunge purse. Talk about a fabby gift idea, you could even drop in gift card to recipients favorite store or restaurant!