
I have been digging deep into my stash this year in an attempt to use it, first of all, and save money by not adding to it! I've been creating a ton of projects and falling in love with older papers all over again. But ... my scrap bin is over flowing!!
What's a girl to do?
Figure out a way to use those scraps in a fun way, of course!!
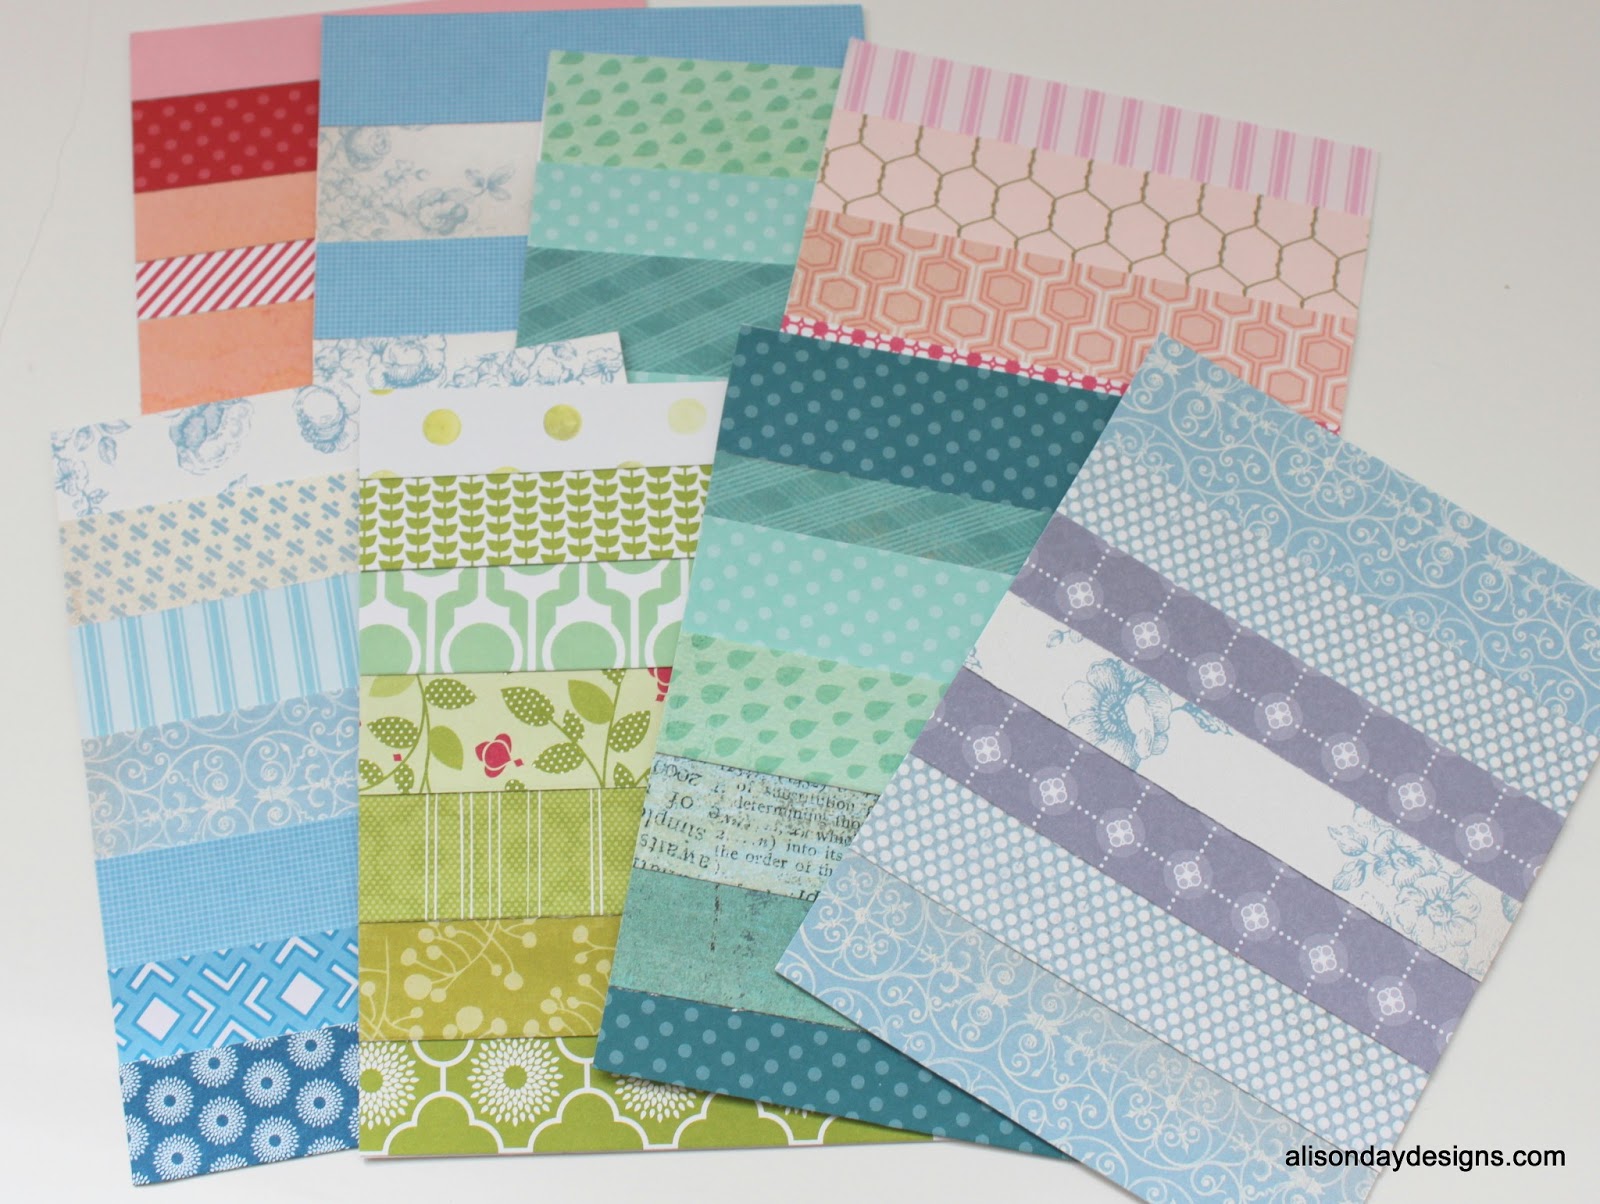
I went through that over loaded drawer and pulled out some papers to get me started. I tried to pull out all different colours. Then I cut them into various widths (there was no measuring involved here - just cut and go!) until I had something that looked like this.

My next step was to cut some card fronts out of plain white card stock. These are 4.25" x 5.5" - basically take a standard 8.5" x 11" piece of white card stock and cut it into 4. Once everything is adhered you can trim the edges so they fit nicely onto a standard sized card.
Then I got sticky!! With double sided tape that is.

Once my card fronts were covered with tape, I started laying down strips in a manner pleasing to my eye.

And then took off the tape backing and stuck everything down. Several hours later (I did this in front of the TV :)) I had a stack of rough card fronts that looked something like this.

Next step in my stash busting challenge was to dig through my stash of embellishments and find some that I could add to make cute, quick cards.
First up was some baby themed chipboard pieces - perfect for making a set of congratulatory cards for new parents.

With my creative juices truly flowing, I dug even deeper into my stash and uncovered 4 cupcake embellishments which turned these next 4 into birthday card fronts ready for anything. And yes, I said card fronts. I don't know about you, but when I am making a card for someone, my colour choices are driven by that person. So I left these as card fronts only which means I can choose the base colour when I need a birthday card and know it will be perfectly suited to the recipient.

Using my Big Shot to cut out the stamped images got me wondering ... could I cut out one of my creations into a shape to be added to a card?

Yes, I could!
These were made from the off cut pieces of the original strips. Pretty tricky, eh? Normally all these small bits would have been swept into my recycling bin but as I was sitting in front of the TV, my recycling bin wasn't nearby. Looking at the growing pile of little squares and rectangles got me wondering if they could be put together to create a quilted look.
Yup!
These are blank cards, just waiting for some suitable occasion.
I wasn't quite finished. I found one more chipboard shape ...

I think this one may be my favourite. So happy!
I still have several card fronts waiting to be embellished which is awesome! No need to get stressed if I need a card any time soon! In fact, there are a few teachers who will be needing cards in another week ... :)
Which ones should I use, do you think?
Thanks for visiting the blog today. I'd love to hear how you use your scraps! Leave a comment with your best ideas, who knows, maybe one of us will use it for our next feature! If you give this method a try be sure to leave us your link so we can see or you can upload a photo to our Facebook Page!


